
Are you looking to take your Honda Ridgeline to the next level? Installing a 4 inch lift kit is sure to give your ride an unparalleled upgrade. But before you start – it’s important to understand how this modification could affect your ride.
This guide will help you understand what you need to know before installing a 4 inch lift kit. You’ll have your Honda Ridgeline ready for off-road adventures in no time!
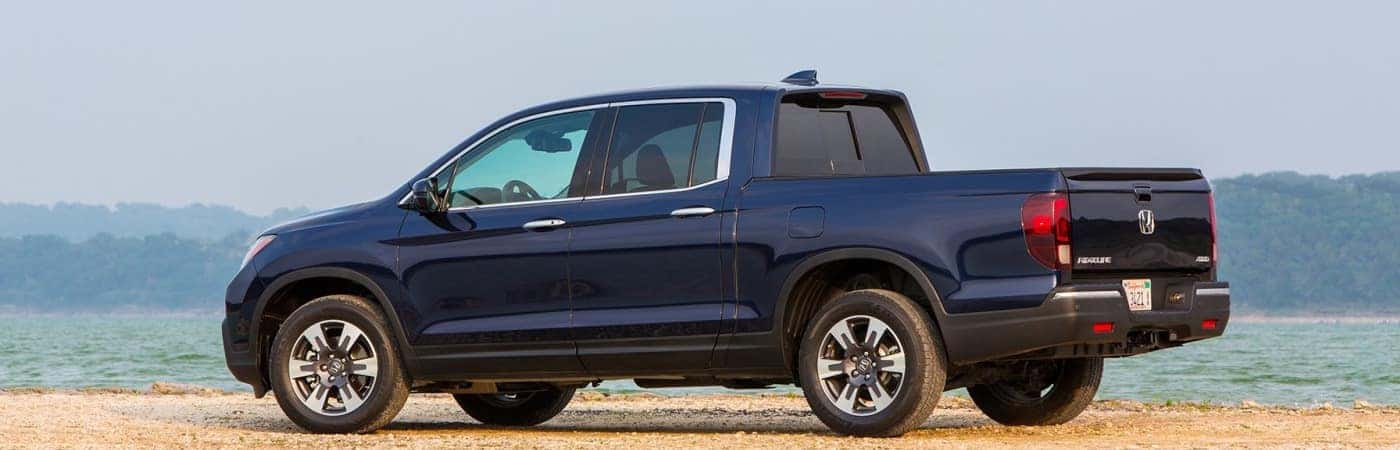
The Honda Ridgeline is a reliable and versatile vehicle, capable of handling all types of terrain and conditions. Installing a 4-inch lift kit on your Ridgeline is a great way to increase your ground clearance, improve the look of your truck, and give it greater off-road capabilities. However, before installing the lift, there are some things you should know in order to ensure your safety and maintain the quality of the ride. This guide will cover the necessary steps to properly install a 4-inch lift kit on your Honda Ridgeline.
We’ll start with an overview of the components required for installation, as well as tips for choosing between different lifts available for purchase. From there we’ll move on to recommend tools you may need during installation as well as how to safely complete all stages without any issues or damage occurring to your vehicle. Finally we’ll end with a few maintenance tips post-installation that can help keep your truck in top shape for many years to come.
Factors to Consider Before Installing a 4 Inch Lift Kit
Before installing a 4-inch lift kit on your Honda Ridgeline, you must consider a number of important factors. It is important to understand that lift kits provide more ground clearance and give your vehicle a more aggressive look. Yet installing one also significantly increases the height of the centre of gravity and affects the handling, which can lead to safety concerns if not considered carefully.
Here are some factors you should consider before undertaking this project:
- Desired Lift – When selecting a lift kit, choose one that is specifically made for your year, model and engine type in order to get the best performance out of it. Keep in mind that a bigger lift will allow for bigger tires, but it sacrifices some control and stability in acceleration and braking.
- Load Capacity – Make sure that you select a properly rated pressure kit for the weight of all occupants and payloads as well as additional load factors such as vehicle accessories or hitch load capacity. A grossly oversized or undersized kit will affect handling negatively so be sure to pick the correct size for optimal performance.
- Professional Installation – Unless you are experienced with automotive repair or restoration, it is advisable to have the lift kit professionally installed by experts who have knowledge specific to your make and model of car, such as certified mechanics at an auto shop or dealership specializing in Hondas. This will ensure proper installation and eliminate potential safety hazards due to improper installations by an unqualified technician.

The Purpose of the Lift
Installing a 4-inch lift kit on your Honda Ridgeline is a popular upgrade that can provide an off-road vehicle with improved performance and greater fuel efficiency. With this lift, drivers can enjoy improved maneuverability and better clearance for obstacles like rocks, stumps, and ruts. The extra clearance also provides added protection from mechanical damage caused by bottoming out on uneven terrain.
The benefits of a 4-inch lift kit include:
- Improved performance and fuel economy
- Greater stability during cornering and braking
- Increased road clearance for navigating over rough terrain
- Added protection from mechanical damage caused by bottoming out.
Tools such as winches, straps, ratchets, air pressure gauges and creeper boards may be required to properly install the lift kit onto your Honda Ridgeline. Additionally, it is important to wear protective gear while performing the installation work in order to ensure your safety.
Legal Regulations
Before you install a four-inch lift kit on your Honda Ridgeline, it is important to understand the legal regulations surrounding such modifications. Depending on where you live, certain changes may be required in order to remain legal and street-legal. It is essential to be aware of local restrictions before you start any modifications that may make your vehicle illegal.
In some jurisdictions, vehicles must undergo safety inspections for items such as brakes and headlights even if the vehicle has been modified from its factory condition. This is true for any aftermarket suspension components installed on the vehicle including larger tires or lift kits that exceed three inches in height.
It’s also important to note that while aftermarket suspension parts extend your Honda Ridgeline’s payload capacity, local laws may restrict how much weight can be towed or hauled by a vehicle with such modifications. Check with your local jurisdiction for specific requirements pertaining to the maximum allowable weight allowances when hauling cargo or trailer hitches/towing configurations. In addition, an upgraded suspension system can also reduce ride quality and handling – something else to consider when modifying your truck’s suspension system.
Compatibility with Vehicle
Before you make a purchase, you need to make sure that the lift kit you choose is compatible with your Honda Ridgeline. In order for it to fit, the parts must be designed for your model year and any additional updates that your specific vehicles may have.
Furthermore, if a lift kit includes shock absorbers or other suspension components, these items must also be compatible with your truck. Additionally, some accessories may require additional modifications in order for them to work properly with a 4 inch lift kit.
It is essential to double-check compatibility of all parts prior to installation.
Cost
Before you decide to purchase a 4 inch lift kit for your Honda Ridgeline, it’s important to consider the associated costs. Depending on the kit you choose, you can expect the cost of installation to run anywhere from around $400- $2,000. This cost may also include additional components such as adjustable coilovers, sway bar links and other suspension parts. If these components are not included, you’ll need to factor in their cost as well.
Additionally, many kits require 18″ or larger off-roading tires that carry a higher price tag. Choosing durable all terrain tires with improved traction will also add significantly to your overall bill. It’s important to research different kits and associated costs before purchasing one so that you have an accurate estimate of what ultimately needs financing or saving up for.
Experience Level
While installing a four-inch lift kit on a Honda Ridgeline may seem complex and intimidating, most projects of this nature can be accomplished without any prior mechanical experience. However, if you have limited or no experience working with vehicles, you should seriously consider consulting with a professional who is knowledgeable about the installation process. In addition to being able to provide advice and assistance with removing and replacing the necessary components, they can also explain which items you should choose for your particular application. Before taking the plunge into DIY vehicle modifications it is important that you have a thorough understanding of all the risks associated with such endeavors.
Even experienced do-it-yourselfers should take their time when installing a four-inch lift kit on their Honda Ridgeline in order to avoid making costly mistakes or putting themselves in danger. Be sure to research every step of the process before beginning and always wear appropriate safety gear while working. Make sure to check all components before purchasing them in order to ensure they are compatible with the make, model, and year of your specific vehicle. When lifting the vehicle to perform the installation it is important that it is well balanced and firmly supported by jack stands placed at designated points according to your manual for Honda Ridgeline owners. By taking these precautions, even novice home mechanics can safely enjoy their life in higher altitudes!
III. Pre-Installation Preparation
Before installing a 4 inch lift kit, preparation is essential to ensure a successful and safe installation. This guide will provide you with some basic tips to ensure that your installation goes smoothly.
- Make sure your Honda Ridgeline is in good repair before attempting any suspension modification, as any existing problems can be exaggerated by an increased suspension height. Check all linkages and joints, and make sure that brake lines are properly functioning and not too worn or brittle. Also check the condition of all drivetrain components prior to installation – this includes engine mounts and transmission mounts.
- Determine your Honda Ridgeline’s load capacity, as the weight of the load will have an effect on ride height and performance after the lift kit has been installed. You should also note that 4 inch lift kits are not recommended for vehicles with a 2wd setup; you should opt for a lesser lift height if you plan on converting it to a 4×4 later down the line.
- Park your Honda Ridgeline on level ground before beginning the installation process in order to get accurate measurements when setting up suspension components later on in the process. To measure accurately, use tools such as inch-pound torque wrenches instead of regular spanners or screwdrivers; failure to do so could lead to inaccurate alignment measurements which can cause issues with vehicle stability once it returns back onto the road after installation of the lift kit is complete.
These tips should help ensure that you get an accurate fit once you’ve installed your 4 inch lift kit – meaning better ride performance with minimal effort!
Tools and Equipment Required
When installing a 4 inch lift kit on your Honda Ridgeline, make sure that you have a full set of tools and equipment required to do the project safely and effectively. Some of the items you’ll need include:
– Jack stands: To support the vehicle while you work on it, properly rated jack stands should be placed in place with appropriate weight requirements and height limitations.
– Floor jack: A reliable, strong floor jack should be used for lifting the vehicle off the ground and placing it onto jack stands. Take care to ensure that all tires have been properly inflated before lifting them up with the jack; otherwise, it can create more problems.
– Socket wrenches: A full set of metric-sized socket wrenches is required to remove necessary parts from your Ridgeline before mounting the new lift kit. Make sure that everything is securely tightened after installation is complete.
– Torque wrench: This piece of equipment is needed for accurate torque readings during installation. It will also help prevent any damage or wear to components caused by over tightening or under tightening bolts or nuts during assembly or disassembly jobs of any kind.
– Necessary hardware: To attach all components correctly using proper torque ratings and settings, secure mounting hardware such as bolts, nuts, washers and other parts should be acquired and kept close at hand while executing the job. Depending on your particular lift kit model’s instructions, other tools may be necessary as well; so make sure you are prepared accordingly!
Finding a Suitable Installation Location
Before you install the lift kit, it is important to identify a sheltered and shaded area with plenty of workspace to complete the job. Also, have a look around and make sure that there are no debris, tools, or objects near where you’ll be working that could get in the way of a successful install. Additionally, check for any sources of contaminants (e.g. oil or grease that could stain or damage your lift Kit) that might affect the installation process further down the line. Make sure to keep all tools and components clean to prevent any dirt from getting into them.
Prior to starting the installation process itself, take some time to review your vehicle’s manual thoroughly and ensure you understand how each component of the lift kit fits together and should be installed in relation to one another on the Ridgeline truck model. Also consider whether any adjustment might be necessary since all trucks will differ in terms of existing trim components. Lastly, make sure that you have all items required for a successful install before beginning by cross-referencing them with what is indicated in the manual provided with your specific lift kit model number.
Safety Precautions
Before beginning the install of a 4 inch lift kit on your Honda Ridgeline, there are some important safety precautions that need to be taken.
Make sure all components are tightened to the manufacturer’s specifications and work with a partner if possible to help hold and lift parts into place for installation. Additionally, always wear safety glasses during installation as well as safety gloves and steel-toe boots when necessary.
It is also important to ensure that all jack stands, jack lifts, and other equipment is thoroughly inspected for any signs of wear or damage before use.
Conclusion
The Honda Ridgeline is a capable off-road vehicle that can be further enhanced with the addition of a 4 inch lift kit. Before you make the purchase, there are several aspects to consider, including suspension components, frame reinforcement, lift blocks and wheels. Once the kit has been purchased, installation is straightforward and can typically be done in a weekend with basic tools.
In conclusion, properly installing a 4 inch lift kit on your Honda Ridgeline requires extensive research and preparation to ensure the job is done correctly. With proper planning and knowledge of what components are needed for your configuration, you can enjoy increased ground clearance without sacrificing ride quality or longevity.
FAQs
Can you install a lift kit on a Honda Ridgeline?
Yes, it is possible to install a lift kit on a Honda Ridgeline.
What is needed to install a lift kit?
The specific tools and materials needed to install a lift kit will vary depending on the make and model of the vehicle and the type of lift kit being installed. Generally, a lift kit will include hardware such as new springs, shocks, and suspension components.
How hard is it to put a lift kit on a truck?
Installing a lift kit on a truck can be a complex and time-consuming process that requires a good understanding of automotive mechanics. It is recommended to seek the assistance of a professional mechanic for installation.
Is it safe to install lift kit?
When properly installed and maintained, a lift kit can be safe. However, improper installation or neglecting maintenance can lead to safety issues.
What are the disadvantages of a lift kit?
The main disadvantage of a lift kit is the potential for increased wear and tear on the vehicle’s suspension components and drivetrain.
What are the disadvantages of putting a lift kit on a truck?
Some additional disadvantages of installing a lift kit on a truck include decreased fuel economy, a higher center of gravity which may affect handling and stability, and potential for increased maintenance costs.
What to know before buying a lift?
Before purchasing a lift kit, it is important to research and choose a reputable brand, consider the specific needs and intended use of the vehicle, and budget for the installation and potential maintenance costs.
Do lift kits require maintenance?
Yes, lift kits require regular maintenance to ensure safe and optimal performance. This includes inspecting and replacing worn or damaged components and checking alignment and suspension settings.
What should you replace when installing lift kit?
When installing a lift kit, it is recommended to replace any worn or damaged suspension components and shocks to ensure proper alignment and handling.
What problems do lifted trucks have?
Lifted trucks may experience issues with alignment, suspension and steering components, increased wear and tear on drivetrain components, decreased fuel economy, and decreased stability and handling.
See Also :
- Best brush guard for Honda Ridgeline
- Best brush guard for Honda Ridgeline
- Best synthetic oil for Honda Ridgeline
- Best leveling kit for Honda Ridgeline
- Best bug deflector for Honda Ridgeline