
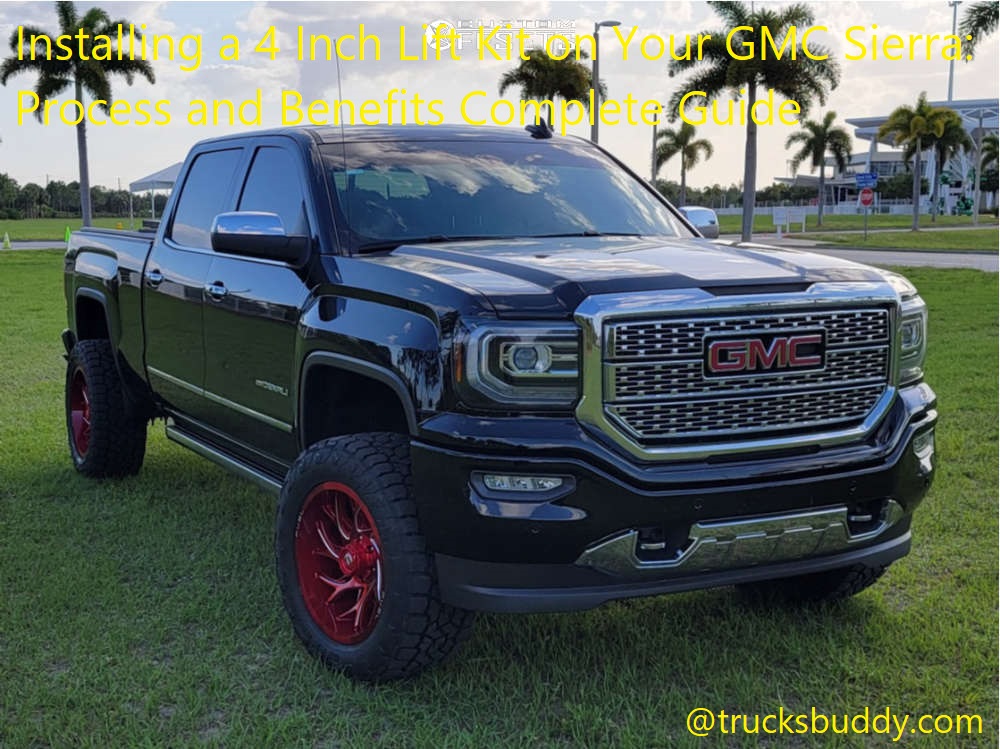
Looking to take your GMC Sierra off-roading? Installing a 4 inch lift kit will give you the ground clearance and power you need. You’ll be surprised to learn the whole process requires only basic skills and tools.
Learn how it’s done, as well as the potential benefits of taking this step.
In this guide, we will discuss the process and benefits of installing a 4 inch lift kit on your GMC Sierra. A lift kit is an aftermarket modification that can increase the height of your truck. It provides additional clearance for larger tires and a higher stance, which helps improve its ride quality. Additionally, it can allow you to fit larger-diameter wheels for better performance and improved styling.
Installing a lift kit requires some knowledge of automotive electrical components and suspension systems, so it’s best to have a professional mechanic do the job for you. Before starting any modification project, it’s important to understand what the risks are of doing the work yourself versus having a professional do it for you. In this guide, we’ll outline the basics of installing a 4 inch lift kit on your GMC Sierra and discuss some of the advantages that come with it. We will also go over some common considerations to keep in mind when choosing which type of lift kit is right for you.
Pre-Installation Preparation
Pre-Installation preparation is essential before installing a 4 Inch Lift Kit on your GMC Sierra. Preparation is key because it helps reduce the risk of unexpected installation surprises, it can save time, and reduce the chance of mistakes being made.
To prepare for installation, start by gathering all necessary tools for the project like a floor jack, jack stands, wheel chocks, tire iron, wheel lug torque wrench and various sockets. Inspect your vehicle to ensure nothing is worn out or broken. Additionally, take note of any issues related to steering and suspension such as worn treads or visible fluid leaks in order to address them before you begin.
Securely elevate your truck using a floor jack and jack stands prior to removing anything – this will aid in better access when you are working on the parts that need replacing or upgrading as part of the lift install process. Adjust the lift kit pieces accordingly if needed and place them aside until you’re ready for installation. Make sure that you park your truck somewhere level so that ride height measurements remain consistent throughout your operations.

Inspecting the vehicle
A proper inspection of the vehicle and lift kit contents is required before beginning work. All the components must be visually inspected against the manufacturer’s instructions to ensure proper fitment with all applicable performance and safety regulations. Start by lowering the jacking point so you can manoeuvre around the underside of the vehicle safely and begin lifting, removing, or adjusting all necessary componets for a successful, bolt-on installation. Be sure to take pictures at various stages throughout installation to serve as reminders should anything become disorientated during reassembly.
Next, remove your factory suspension components such as shocks, struts, brackets, control arms and steering knuckles if they are present on your vehicle. Begin by unbolting each of these parts from the chassis so they can be easily removed without damaging nearby wiring or hoses; being very careful not to loosen or disturb any existing factory settings while doing so. Depending on certain models and years of production some additional steps might need to be taken such as decoupling wiring harnesses and removing ABS relays if applicable.
Choosing the right lift kit
Choosing the right lift kit for your GMC Sierra is vitally important to ensure an effective and trouble-free installation. Keep in mind that we will install a 4-inch lift kit, so anything other than that may complicate the process.
Firstly, make sure the components of the lift kit are built with quality materials such as powder-coated steel or other strong metals. Poorly designed or made products may result in a dangerous situation while driving.
Secondly, ensure that all components of the lift kit will fit into your truck’s suspension system properly and ensure proper arcs. If any parts are too small or large for your truck, it could be disastrous for your vehicle’s handling ability and might result in more expensive problems down the road.
Lastly, confirm that you’re getting all the necessary parts from reputable companies with good customer service to provide technical assistance when needed after installation.
Installation Process
Once you have acquired the appropriate lift kit for your GMC Sierra, the installation process can begin. Carefully read the instructions that come with your lift kit and make sure all parts are present and in good condition prior to starting. Before beginning, you should have basic mechanical skills and common tools including wrenches, ratchets, hydraulic jacks and an air compressor is also recommended. For safety purposes, it is advised that two people handle the installation.
1) Raise the vehicle using a hydraulic jack and secure it on jack stands.
2) Remove both front tires to easily access bolts connecting lower control arms to frame cradle bracket.
3) Loosen nut located on top of upper A-arm shock bolts using a ratchet or wrench. Disconnect sway bar links from factory mounting locations on A-arms (if applicable).
4) Loosen and remove ball joint nuts from spindle with removal tool or ratchet wrench before completely disconnecting both upper and lower ball joints.
5) Unbolt factory strut assembly located at the base of welding jounce by removing center portion spring isolator retainer with a combination of socket wrenches & pliers (if equipped).
6) Disconnect end clips/clamps holding rubber dust boots around steel sleeves connected to upper A-arms by using pliers or cutting off if necessary (if equipped).
7) Once all components are removed, prepare aftermarket parts included in lift kit for assembly according to instructions provided by manufacturer which typically involves greasing all bushings if they are not pre-greased by manufacturer.
8) Connect front axle shafts into large bushing temporarily secured in control arms as well as new greaseable ball joint bolts into spindle holes securely with ratchet or wrench as designated in instructions per manufacturer’s guidelines before tightening large locknuts onto new studs & correctly torquing them excessively (45Lb/Ft+).
Once installation process is complete ensure all components are correctly secured before taking vehicle off jack stands for proper tire alignment followed by performance test drive at low speeds to check for any issues that may have not been caught due to height difference until comfortable driving at full speeds (ensuring adherence of speed limits).
Alignment and adjustment
Once the installation of the lift kit is completed, alignment and adjustment of the wheel angles are essential. To obtain proper wheel alignment, a qualified technician should adjust the camber and caster angles so that they meet manufacturers’ recommendations. Additionally, a four-wheel alignment should be performed every time changes occur to a vehicle’s suspension or when rock crawling or off-roading cause additional stress on the vehicle’s components.
Alignment measurements are based upon the angle of two planes—the camber angle and caster angle. The camber angle is the inward or outward tilt of both tires as viewed from the front or rear of the vehicle while in its static position. Caster angle measures the forward turn toward either side of both tires within their relationship to one another when viewed from directly in front or behind while in its static position. These angles should be adjusted according to your lift kit manufacturer specifications as factory settings may not be suitable for lifted applications as this adjustment helps improve your steering sensitivity by highlighting driver response issues and will ultimately provide improved handling capabilities during turns and lane changes at highway speeds.
Installing new lift kit components
The next step involves installing the components that come in the 4” lift kit. Each kit should include instructions specific to make and model, so it is important to read through the instructions carefully. The actual installation process can vary drastically between makes, models, and lift kit brands; however, generally it will involve installing new shock absorbers, leaf springs or possible coil springs, struts or knuckles for an IFS truck, new differential drop brackets for some types of kits and U-bolts.
It is important to follow manufacturer instructions exactly when performing this work as a 4 inch lift increases stress on components and must be installed correctly for safe operation of the vehicle.
When all other components have been installed, the last step will be to fine-tune the alignment of your vehicle according to install instructions before considering your work complete.

Post-Installation Considerations
After your lift kit has been installed, there are several things to do to ensure the safety and proper functioning of your vehicle. Firstly, a wheel alignment is necessary to ensure that the caster and camber settings are properly adjusted for the new height. It’s also important to check all wheel nuts for tightness after driving your GMC Sierra for a few hundred miles, as these may have become loose during the break in period. Additionally, if you plan on off-roading with your truck, you may want to consider adding lubricant or rust inhibitor to prevent any potential damage caused by mud or rocks.
Lastly, larger tires may be necessary in order to maintain proper performance and handling at higher speeds. Tires designed specifically for lifted trucks provide increased traction and stability while driving at high speeds on highways or off-road trails. When choosing tires it’s important to take into consideration tire tread wear rating and size before purchasing as these decisions can mean improved maneuverability and braking performance along with an overall smoother ride experience.
Testing and fine-tuning the suspension
Once the lift kit is installed and the wheels are mounted, it’s important to make sure that your truck is running properly and that there are no safety concerns. A good way to do this is to take your truck out for a test drive. This will help you identify any problems with the installation or areas where you may need more adjustment or fine-tuning.
It’s also important to keep a close eye on how your suspension responds after the lift kit is installed. You want to ensure that the suspension can still effectively absorb shocks and vibrations from road bumps, potholes, and other obstacles as before, but at higher heights. Making any necessary adjustment to your shock absorbers will give you a longer lasting, smoother ride by helping reduce wear on your truck’s components caused by sudden drops in height or large impacts with bumps in the road.
Additionally, you should inspect all of the nuts, bolts and components of your GMC Sierra’s lift kit after test-driving; it’s always better to be safe than sorry when it comes to ensuring all parts are securely attached. Lastly, make sure all of your tires are adequately aired up; if they’re too inflated they could become overstretched while driving and cause serious damage at high speeds.
Checking for any loose components
Before installing your lift kit, you should check if any of the components are loose, worn or damaged. You can do this by inspecting the ball joints, tie-rod ends, control arms and shocks. Check for excessive wobble or play in the U-bolts and shackles.
Make sure to lubricate all moving parts such as these when they are checked and inspected prior to installation. You can also check your calipers with a brake test before starting; make sure that they are within factory specifications.
Additionally, check the brakes and beam suspension bushings for wear or damage as improper bushings may cause shake when driving at high speeds.
Finally, measure your vehicle shocks for maximum stroke length so that you know how much clearance you need to fit the larger tires you will use after installation is complete.
Maintenance requirements
In addition to the typical preventative maintenance common to all vehicles, such as regularly checking and changing fluids, tires and brakes, there are certain considerations that need to be taken into account when running a vehicle with a 4-inch lift kit. By not properly maintaining your lift kit and other suspension components, you can increase wear and tear on your GMC Sierra which may cause significant problems down the road.
The most important maintenance for an owner of a 4-inch lifted GMC Sierra is to inspect all components regularly in order to identify any issues that arise from rough off-road driving or daily driving conditions. This includes inspecting the mounting points for any signs of rust or damage due to wear and tear associated with time and use. Additionally, all lifting components should be tightened regularly in order to keep them from loosening over time.
It is highly recommended that all owners of 4-inch lifted GMCs also consider replacing their U-joints on each driveshaft at least once every year or two in order to ensure maximum performance during off-roading or daily driving applications. It is also good practice to inspect the front end driveline angles and adjust them as needed each year in order to reduce drivetrain vibrations which can wear down other related components faster than usual.
Proper maintenance of your 4 inch lift kit, suspension system and driveline components is essential if you want your GMC Sierra not only look great but also perform optimally no matter what type of terrain you might encounter on the road. All owners should familiarize themselves with their vehicles warranty terms so they know exactly what maintenance items need attention throughout their vehicle’s lifespan.
Safety precautions
It is important that all safety precautions be observed when installing a 4 inch lift kit on your GMC Sierra. Always make sure you have the correct tools for the job and ensure that you are using the kit in accordance with the manufacturer’s instructions to avoid any incidents.
When considering installing a 4 inch lift kit, consider personal safety first and always wear protective clothing and eyewear when lifting or working near fluids. Make sure to inspect all parts for wear or damage, including nuts and bolts; any parts requiring lubrication should be done before installation. Keep an eye out for obstructions as well as often-missed items such as wiring, brake lines, exhaust systems and air bags.
It is essential to check mounting locations on your vehicle’s frame before beginning installation of any type of lift kit. If any localized rust or excessive corrosion is present on existing components, it may indicate structural problems that must be addressed prior to installation. Additionally, inspect steering components including drag links, steering rods bushings and racks; these all should remain below or level with the specified height of the lift being installed.
Conclusion
In conclusion, installing a 4 inch lift kit on your GMC Sierra is a relatively straightforward job that most average DIYers can tackle. The quality of the parts you choose will be important for the safety, performance and longevity of your truck. It should also be noted that some vehicles may require additional modifications to create enough clearance for the larger wheels and tires, such as minor trimming of body parts or suspension components.
With a dedicated install plan from the start, and the correct tools and procedures followed throughout the process, you can successfully achieve professional results when performing this installation. There are numerous benefits to installing lift kits such as improved braking power and enhanced off-road capabilities while also benefiting from an increase in fuel economy as increasing tire sizes ultimately results in increased engine power output.
It should also be mentioned that larger rims can increase sturdiness on any terrain thanks to their larger size, allowing for easier steering response, greater ground clearance and an overall much better experience with both on-road handling and off-road capability.
FAQ’s
How long does it take to install a 4 lift kit?
It can take around 4 to 6 hours for a professional installer to install a 4 lift kit.
What are the benefits of installing a lift kit?
Some of the benefits of installing a lift kit include improved ground clearance, enhanced off-road performance, and a more aggressive look.
What advantages do you get with a lifted truck?
A lifted truck offers better visibility, greater off-road capability, and improved towing and hauling capacity.
What are the disadvantages of a lift kit?
The disadvantages of a lift kit can include a harsher ride, decreased fuel efficiency, and potential damage to the vehicle’s suspension and drivetrain components.
What are the disadvantages of lift?
Lifts can be expensive to install and maintain, and they can take up a lot of space.
What is the disadvantage of a 4 post lift?
The disadvantage of a 4 post lift is that it takes up a lot of space and can be more difficult to use than other types of lifts.
Does a lift kit affect performance?
A lift kit can affect performance by increasing the vehicle’s center of gravity and changing its handling characteristics.
Does a lift kit affect 4×4?
A lift kit can affect a 4×4’s performance by altering its suspension geometry and potentially causing issues with drivetrain components.
What are the 3 types of lifts?
Scissor Lifts
Boom Lifts
Vertical Mast Lifts
Does a lift damage the truck?
No, if the lift is used properly and the weight capacity is not exceeded, it should not damage the truck. However, improper use or exceeding weight limits can cause damage.
See Also:
- Best cold air intake for GMC Sierra
- Best wheel spacers for GMC Sierra
- Best exhaust for GMC Sierra
- Best exhaust for GMC Sierra
- Best nerf bars for GMC Sierra