
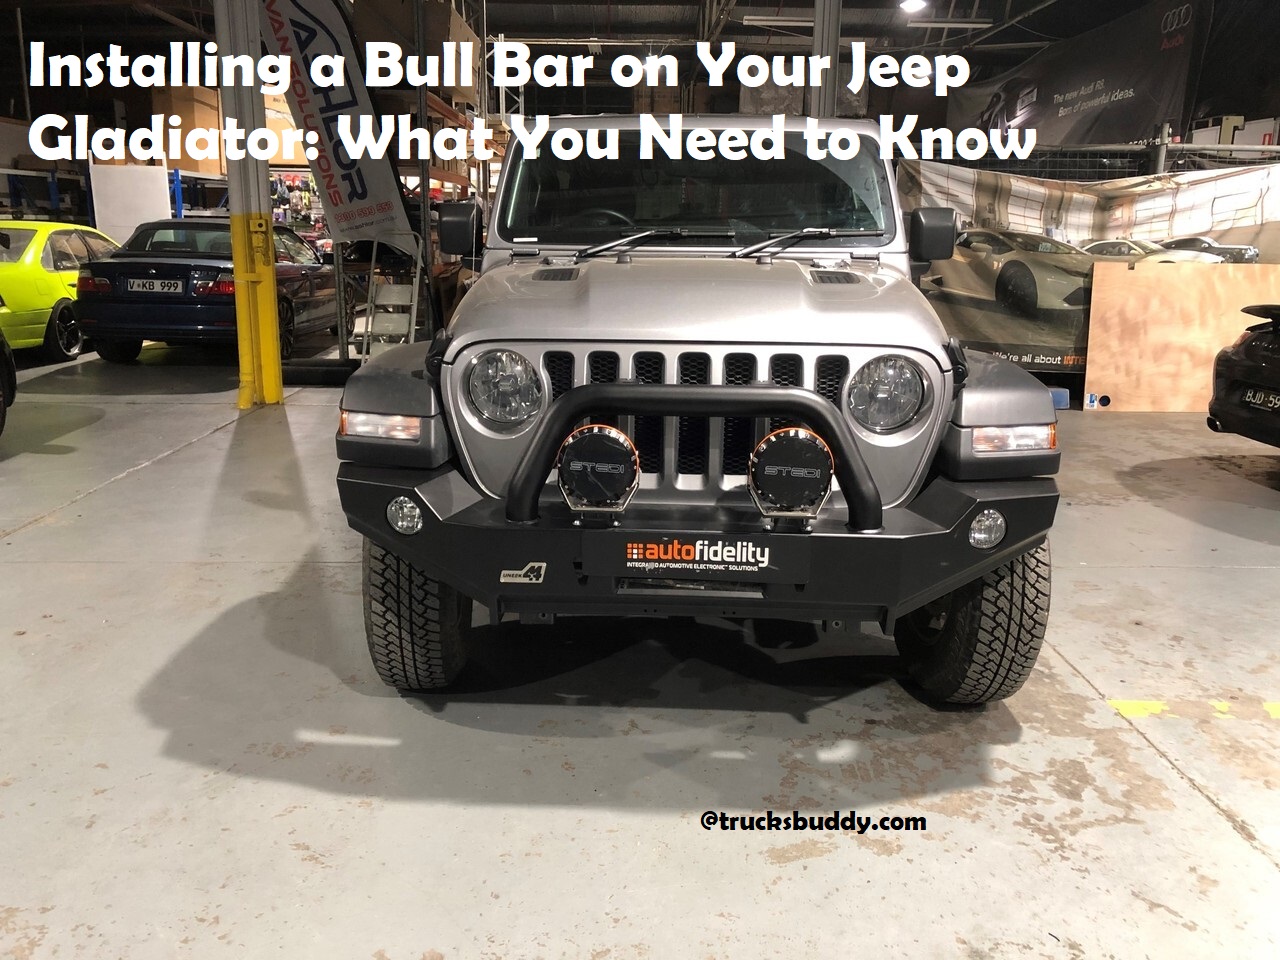
Are you a Jeep Gladiator owner wondering what’s involved in installing a bull bar? Let us guide you through the process and equip you with the knowledge to ensure your new bull bar is properly installed. You can count on us to provide reliable information for a smoother installation process.
Installing a bull bar onto your Jeep Gladiator can be a great addition to your vehicle and provide added protection for your grill, lights, and windshield. With this guide, you’ll receive an in-depth look at what you need to know before installing a bull bar on your Jeep Gladiator. We’ll cover everything from general installation guidelines to the materials and tools you’ll need to complete the job. You will also receive step-by-step directions on how to properly attach the bull bar to ensure maximum durability and effectiveness. So let’s get started and find out what you need to do in order to securely fit a bull bar on your Jeep Gladiator.
Research and Preparation
Before starting your installation, it is essential to do some research on your specific vehicle and the bull bar you have chosen. This will help ensure that the components fit correctly and that you have everything you need in order to complete the job. You’ll want to pay special attention to any additional parts required for installation, such as hardware or mounting brackets.
It’s also imperative to review any local laws or regulations regarding bumper bars before beginning the installation process. In some states and jurisdictions, adding these types of bar may be prohibited due to their associated risk factors such as obstructing visibility or airbags. It’s important to familiarize yourself with applicable laws prior to making any modifications on your vehicle.
Reviewing product manuals, users’ reviews, and helpful advice from forums can provide insight into what other Gladiator owners have already done successfully for their installations. Doing this research ahead of time will help give you a better understanding of the job at hand before diving in.
Research on various bull bar options
Before you start the process of installing a bull bar on your Jeep Gladiator, it is important to do research and make sure you are purchasing the right product. Tackle both style and function when choosing a bull bar. Different materials, designs, and manufacturers can affect the bull bar’s price, but they also impact its strength and durability. Spend some time familiarizing yourself with the many options that are available before deciding on one product – this will help ensure the best fit for your vehicle, as well as increase its lifespan.
When researching suitable materials for your bull bar consider steel or stainless steel – two of the toughest metals available – as well alloys such as aluminum, titanium or magnesium. Different materials can have different functions; for instance aluminum may offer greater corrosion resistance than steel or stainless steel but at a cheaper price, making it an attractive option if you’re looking for both value and protection from wear and tear. Steel is likely to be stronger than aluminum — but heavier — so keep this in mind when choosing between them. You should also look out for thinner metal specifications that shouldn’t be overlooked either since lighter weights will allow for more efficient use of fuel and convenience in maneuverability of the vehicle itself.
It is also recommended to research any special features offered by different brands when selecting a bull bar model – including built-in LED lights which can come in handy in dark conditions, as well as skid plates that offer protection while off-roading etc..Be sure to go through customer ratings and reviews (both on sites like Amazon or dealer stores) to assess what other people think about specific products before buying them; this way you can get an idea of how these products have stood up over time and what corrections have been made (if any). Making an informed decision now has long-term benefits later so be sure to take time dialling down exactly what types of attributes your new bull bar should include.
Understanding the legal restrictions in your state/country
Before beginning installation of your bull bar, it’s important to understand the legal restrictions in your state or country. Many jurisdictions have regulations regarding aftermarket modifications and safety features on vehicles.
In the United States, the Federal Motor Vehicle Safety Standard (FMVSS) defines aftermarket equipment standards. This standard applies to all motor vehicle parts imported, manufactured, or sold in the US. It prohibits installing any automotive part that reduces a vehicle’s crashworthiness or increases an unreasonable risk to motor vehicle safety.
On a state level, some states have specific laws concerning bull bars on vehicles as well. For example, some states prohibit attaching anything that protrudes more than 2 inches from either side of the vehicle. While other states may allow them, there may be restrictions regarding which types of bull bars you can use or what materials must be used for construction of the bar (often requiring tubular steel).
In addition to these regulations, you should also check with your city for any local ordinances – such as noise-level restrictions – that may be relevant when installing a bull bar on your truck.
Gather tools and equipment required for installation
It is important to have the right tools and equipment on hand to ensure the proper installation of a bull bar onto your Jeep Gladiator. Depending on what type of material you choose for the bull bar, you may need some specialized equipment such as wrenches and drill bits. Other essential items include safety glasses, gloves, hex keys, sealant, tape measure and clamps. It’s also best practice to consult your vehicle owner’s manual before you begin installation so that you are familiar with any specific cautions or recommendations that may apply.
The toolbox should be stocked with all necessary parts as well as any optional accessories that could enhance the installation process such as zip ties for fastening bracket bolts or self-tapping screws for rubber gasket seals. Additionally, it can be helpful to have a socket set handy if you anticipate needing to loosen or remove components from underneath the vehicle during the installation process. Finally, an assistant can come in handy if needed for any lifting tasks associated with maneuvering around parts or heavier components.
Removing the Factory Bumper
Before you begin the installation process, you need to remove the factory bumper from your Jeep Gladiator. This can be done a few different ways, depending on how your Gladiator is set up.
For example, if you have a Gladiator JT model (2019-2021), then all you need to do is locate the four bolts located at the bottom of the bumper behind each wheel well. Use a ratchet and socket tool set to unscrew them and separately set aside.
On other model years (2007-2018), you may need an impact wrench as there are several additional bolts that hold the factory bumper in place. After unscrewing all these bolts, be sure to properly organize them so that it’s easier for when it’s time to reinstall your bull bar.
Step-by-step guide for safely removing the factory bumper
This guide is designed to walk you through the steps required to properly remove the factory bumper from your Jeep Gladiator and safely install a bull bar in its place. Before beginning, make sure the engine is off and that all the necessary parts and tools are ready.
- Start by disconnecting all wiring harnesses, switches, and electrical plugs connected to the factory front-bumper mounting area. Doing so will make it easier for removal of the bumper itself.
- Once disconnected, use a wrench to loosen and remove all existing bolts that secure the front-bumper mounting bracket to the frame of your Jeep Gladiator. Be careful not handle sharp edges or pointy surfaces with your hands as you do so, as this can result in injury or broken parts if handled too roughly.
- Once all bolts have been removed from both sides of the bumper mounting bracket, you can gently pull away from it away from the frame (note: never force removal). Make sure that any wiring harnesses or other items remain intact upon removal –depending on design these may need further attention once removed.
- Next, take all necessary safety measures when lifting or maneuvering heavy objects on your own or with someone else’s help in order to avoid injury during bull bar installation process; this includes wearing protective work gloves and observing proper posture throughout to ensure correct weight distribution during lifting/lowering operations.
- With safety measures taken care of and new bull bar in hand (or set aside nearby), grab your wrench once again—this time we’ll be using it for installation purposes as our next step requires securing new mounting brackets into position via provided hardware along with bolt passages on existing frame edges—taking care not pinch or damage wiring etc whilst doing so! Also keep an eye out for any adjustments that might be needed for perfect placement—our work here should be precise enough such that no such issues arise during driving/operation phase later on down road…
6 Finally –after ensuring everything is neat n tidy according those spec sheets & before setting back inside our beloved 4Xe– lets make real sure everything’s within exact tolerances by giving area & newly secured components one final scan & systematic checkup… Glad we did this amount of prep earlier bcz now everything feels like well-bolted together!
Tips for avoiding damage to the vehicle during removal
In order to ensure that the Jeep Gladiator remains in optimal condition, there are a few tips that one should follow when attempting to remove the bull bar from the vehicle.
First and foremost, it is important to ensure that all necessary tools and hardware are accessible before beginning removal. This will help to minimize time spent searching for materials and inform of any measurements needed before cutting or drilling any parts of the Jeep.
Furthermore, if any factory parts are being removed in order to install the bull bar, they should be handled with care during detachment and storage. After factory parts have been detached, care must be taken to ensure that components do not become scratched or chipped as this can diminish performance upon reinstallation.
Finally, when re-installing the original hardware on either side of the bull bar, ample time should be taken ensuring tight but not overly tight threading for both screws and nuts. Over-tightening may cause permanent damage that could lead to eventual failure which could cause harm on the road. In addition it should also be noted that all airbags around the vehicle’s exterior need their connectors left untouched while any work is undertaken near or on them due to high sensitivity of their sensors.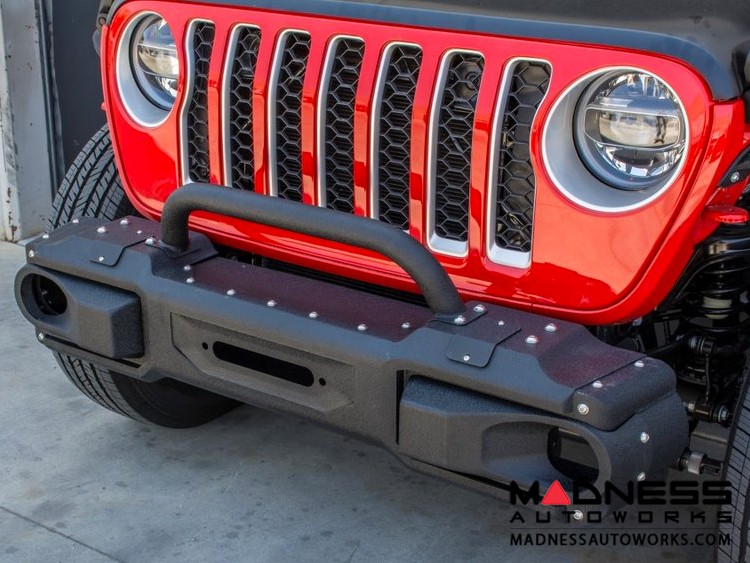
III. Installing the Bull Bar
Before you install the bull bar, take the time to read over the instructions carefully. After unpacking all components, you will need to lay out the parts and check that you have received everything listed in the instructions. Then, choose a drive-on jack or hydraulic lift that can fit your Jeep Gladiator on one side of your carport or garage in order to begin installation.
Once you have acquired access underneath your vehicle, use a brush or hose to clear away any dirt and debris. This is particularly important if you plan on using self-tapping screws, as they are not designed to be used on dirty surfaces.
Secure one side of the bull bar mounting bracket with two eye bolts through the wheel well before attaching it to your Jeep’s frame rail behind the bumper. Then attach your other bracket for added stability with bolts and large washers on each end of the rail. Make sure both mounting brackets are facing inwards toward each other for best stability and support for your bull bar before tightening them down completely with a socket wrench.
Next, remove any plastic clips that may be holding up wiring from underhood taking precautions not to block air vents or damage wires by either pushing them aside or taping them up temporarily if necessary. Finally attach bull bar itself onto pre-drilled holes of mounting brackets using appropriate nuts and bolts given in instructions while also securing grille guard onto frame rails as well as brackets at same time. Then make sure everything is tightened down securely before enjoying an entirely new look for your vehicle!
Explanation of the different types of bull bars
When it comes to adding protection to the front of your Jeep Gladiator, a bull bar is the ideal choice. A bull bar is a metal bar that sits at the front of your Jeep Gladiator and provides extra protection from the hazards of off-roading. It also looks great on the Jeep Gladiator.
There are several types of bull bars available including full length, mid length and stubby bars. The full length bars are designed to protect all sides of your Jeep Gladiator’s front end including the grille, lights, head light covers and radiator while still allowing air circulation and access to necessary components such as hood latches. Mid length bars cover almost as much area and encompass nearly every essential component without obstructing airflow. The stubby bars are designed for a more minimalistic look but still offer protection in key areas such as the grille and headlights.
No matter which bull bar you decide on for your Gladiator, it’s important to remember that each type serves a purpose and has advantages depending on what you need out of it – from style to added protection.
Step-by-step guide for installing the bull bar
Installing a bull bar on your Jeep Gladiator is a straightforward process that requires just a few tools and supplies. You will need the following components to complete the job:
-Bull bar of your choice, including all mounting hardware;
-Socket set with 8mm, 10mm, and 13mm heads;
-Flathead and Phillips screwdrivers;
-Adjustable wrench;
-Pliers.
Once you have gathered all the necessary pieces, you can begin installing the bull bar on your Jeep Gladiator. Follow these steps for the best results:
- Place the bull bar up against the front of your Jeep Gladiator and loosely secure it using two 8mm nuts in an outwardly facing position. These will be used to anchor the bull bar to its mount points so make sure they are in place before continuing.
- Unscrew four 10mm bolts from each side of your grille to gain access to two mounting locations on either side of your Jeep’s chassis beneath the grille guard insert. Use a socket set or adjustable wrenches for this purpose as needed.
- Secure the bull bar at both sides with two 10mm bolts and washers supplied in kit or purchase separately if necessary. Using a socket head allows for an easier installation process than using an adjustable wrench as it fits better into rounded off bolt heads and spaces that might prove difficult to access otherwise, making it perfect for recessed areas around vehicle components such as radiator fans and pumps among others safely out of view near front bumper assembly parts. Make sure all bolts are tightened evenly so that they can support weight equally when in use while allowing enough movement when lifting any corner part off ground according clearance applications required by specific undercarriage fabrications installed in your truck model version place, including functionality improvements provided aftermarket addons lowering schedule maintenance cost efficiency use regular supplied kits instance providing driver control stability offroading deployments conditions require breaking harsh terrains apart mountain patches hills surfacing types terrain (dirt sand mud snow water) facilitating navigational location system navigation setup restoring factory settings quickly case necessity arises further upgradation options higher efficiency power transfer terrain adapted mode respond changing conditions accept tough climatic preconditions arrival trailing paths given identity marks integrated guider offered accuracy perfect GPS time lapse traverse given area directional lay mapping known guides available located general vicinity.
Tips for ensuring proper alignment and fitment
Before you begin installing your bull bar, make sure to properly align and fit the bumper. Carefully measure the overlap between the bumper and the grille on both sides to ensure that you have sufficient clearance. If there is too much overlap, that could reduce air flow to the engine or cause unnecessary drag. Make sure both sides are not flush with the grille by at least two inches for proper fitment.
Next, you need to ensure that all mounting points on both the vehicle and the bull bar are secure and tight. All bolts should be tightened in a cross pattern following the manufacturer’s instructions as closely as possible, as this ensures even weight distribution across all bolts and helps prevent warping or bending of any part of either component. Remember that if these components are improperly secured, it can reduce their lifespan significantly or put other parts of your vehicle at risk of damage if an accident were to occur.
Once everything is secured and properly aligned, test drive your vehicle at various speeds over a variety of terrains to ensure it is performing safely and efficiently before outfitting it with additional accessories such as lights or winches.
Instructions for securing the bull bar in place
Once you have installed your bull bar on the vehicle, make sure you securely fasten the brackets around the frame of the Jeep Gladiator. To do this, use bolts that match your drilled holes, as well as appropriate nuts and washers. Be sure to tighten them securely in place. Once in place, make sure there are no signs of stress or tension before moving on to the next step.
In order to ensure your bull bar installation is complete, check all bolts and make sure they are tight and secure before heading out on any off-roading adventures. Make sure that all brackets are undamaged and check for any warning lights or dashboard displays that may indicate an issue with your installation.
Finally, apply protective covers over exposed surfaces—especially around joints and connections—in order to reduce corrosion caused by moisture or dirt build up. This will help keep your bull bar in perfect condition for years to come!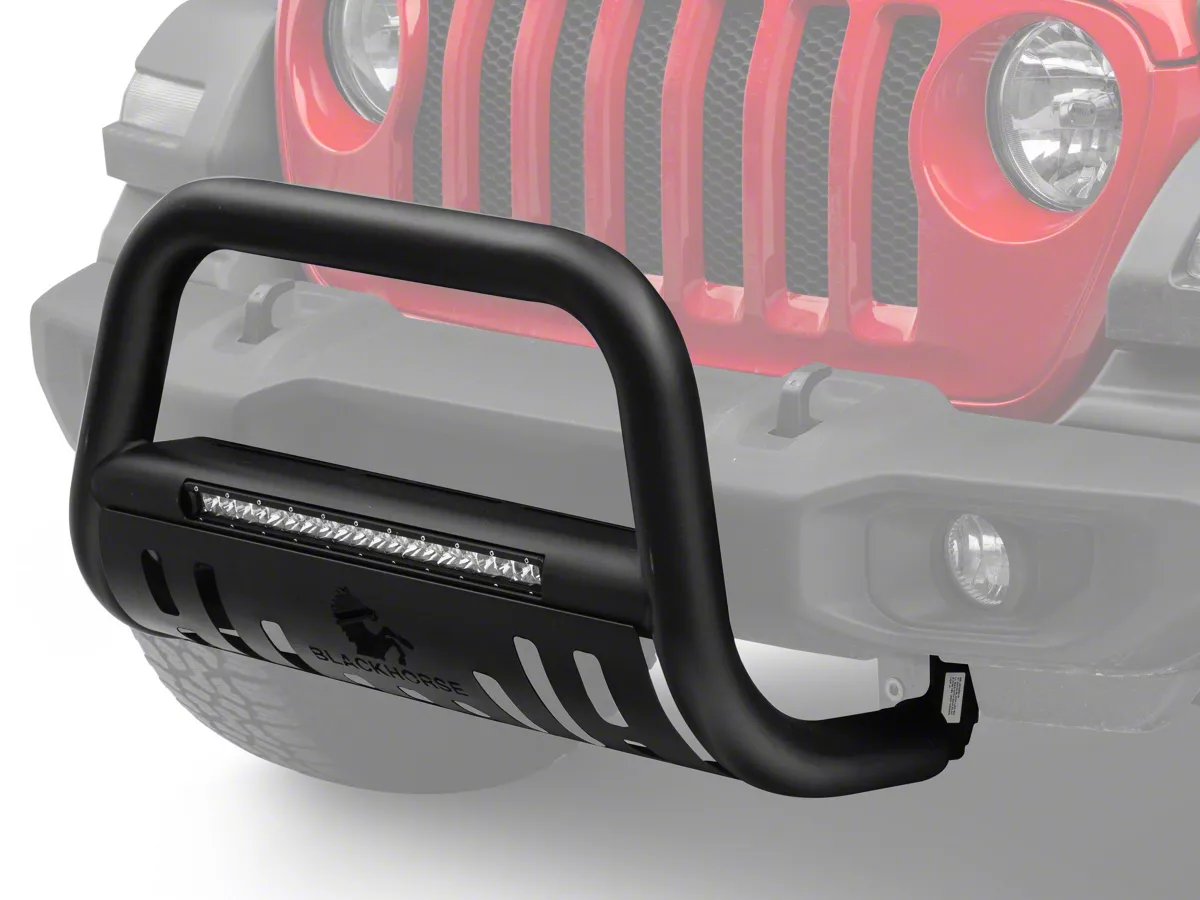
Conclusion
In conclusion, there are many things to consider when you are looking to install a bull bar on your Jeep Gladiator.
First, consider the size of your vehicle, as this will determine the type and size of bull bar that you need. Secondly, keep in mind that all bull bars should be installed by a professional technician who is experienced in Jeep Gladiator installations.
Thirdly, ensure that you purchase the highest quality products for your installation. Lastly, make sure that your new bull bar fits securely and remains off the ground to avoid any damage from road debris or other motorists.
With these basic considerations in mind and with the help of a professional technician, installing a Jeep Gladiator bull bar will take minimal time and effort for an impressive look that will keep its shine for years to come!
FAQ’s
Is it hard to install a bull bar?
The difficulty level of installing a bull bar depends on the make and model of your vehicle and the type of bull bar you want to install.
How long does it take to install a bullbar?
The time it takes to install a bull bar can vary greatly depending on the complexity of the installation process and the experience level of the installer.
What is the purpose of a bull bar on a Jeep Wrangler?
A bull bar on a Jeep Wrangler is designed to protect the vehicle’s front end from damage caused by collisions with animals, debris, or other obstacles.
How much does it cost to get a bull bar fitted?
The cost of getting a bull bar fitted can vary greatly depending on the type of bull bar you want to install and the make and model of your vehicle.
Are bull bars a good idea?
Bull bars can provide protection for your vehicle’s front end, but they can also increase the risk of injury to pedestrians and other motorists in the event of a collision.
Do bullbars use more fuel?
The additional weight of a bull bar can increase fuel consumption, but the exact amount will depend on the make and model of your vehicle.
Do bull bars affect airbags?
Bull bars can interfere with the deployment of airbags, which can increase the risk of injury in the event of a collision.
Are bull bars good in crashes?
While bull bars can provide protection in low-speed collisions, they can also increase the risk of injury to pedestrians and other motorists in high-speed crashes.
Do bull bars decrease gas mileage?
The additional weight of a bull bar can increase fuel consumption, which can lead to a decrease in gas mileage.
What are the rules of bullbar?
The rules regarding bull bars vary by country and jurisdiction, but they typically address issues such as height restrictions, materials, and safety requirements.
See Also-
- Best spark plugs for jeep gladiator
- Best truck tent for jeep gladiator
- Best all terrain tire for jeep gladiator
- Best nerf bars for jeep gladiator
- Best headers for jeep gladiator