
Replacing an antenna can be a difficult task if you don’t know what you’re doing; fortunately for you, we have just the guide!
You can replace your Honda Ridgeline Antenna without any hassles after reading this comprehensive guide. From understanding the components to ensuring a tight fit, you’ll learn it all in this article.
Welcome to this comprehensive guide for replacing the antenna on your Honda Ridgeline. In this guide, we walk you through the process of identifying the parts for replacement, gathering or ordering the materials you’ll need, and completing the job from start to finish. We cover safety precautions and common mistakes so that you can be sure you have all of the information necessary to get your Honda Ridgeline antenna off and out of trouble. We’ll also provide an overview of some additional maintenance checks and services that may be needed while performing a repair on this model.
We understand it might sound complicated at first, but with careful preparation and a clear plan of attack, any do-it-yourselfer will find this task manageable — and can save a lot of money in the process! The replacement procedure is straightforward once you have all of your materials gathered. We have outlined each step below so that if any issue should arise, you have a clear map for how to fix it without causing further delay or damage.
Tools and Materials Needed
In order to replace the antenna in your Honda Ridgeline, you will need the following tools and materials. Depending on the type of antenna you are installing, more advanced specific tools may be needed. It is important to assemble these items before beginning so that you can work efficiently.
Tools:
- Screwdrivers (Phillips and flathead)
- Socket wrench and set of sockets
- Electrical tape
- Wire cutters
Materials:
- New antenna assembly
- Small screws or nuts to attach new antenna assembly.

List of necessary tools and materials
Proper preparation is essential for successful completion of the project. Before you begin, make sure to gather all the necessary tools and materials. A list is provided below:
-Flathead screwdriver
-Phillips head screwdriver
-New antenna (Size should match to your Honda Ridgeline model)
-Cleaning cloth/rubbing alcohol
-A ladder or step stool (as applicable, depending on the height of your antenna)
In addition, make sure that you are working in a well ventilated and uncluttered area before starting any automotive task. Once prepared, you can begin installing your new antenna following the steps outlined in this guide.
Description of each item
This guide will provide a comprehensive list of all the materials needed to replace the original car antenna of your Honda Ridgeline. Before starting on the project, be sure to read through the manufacturer’s instructions, as well as any other related literature. If you have any doubts or concerns, be sure to contact a professional before beginning.
Materials Needed:
- Replacement car antenna: A replacement Honda Ridgeline antenna is essential for successful installation. Be sure to select an appropriate size and model based on your vehicle’s factory specifications.
- Screwdriver or Socket wrench set: A screwdriver or socket wrench set will be needed for loosening and tightening screws in order to remove and install the new antenna assembly.
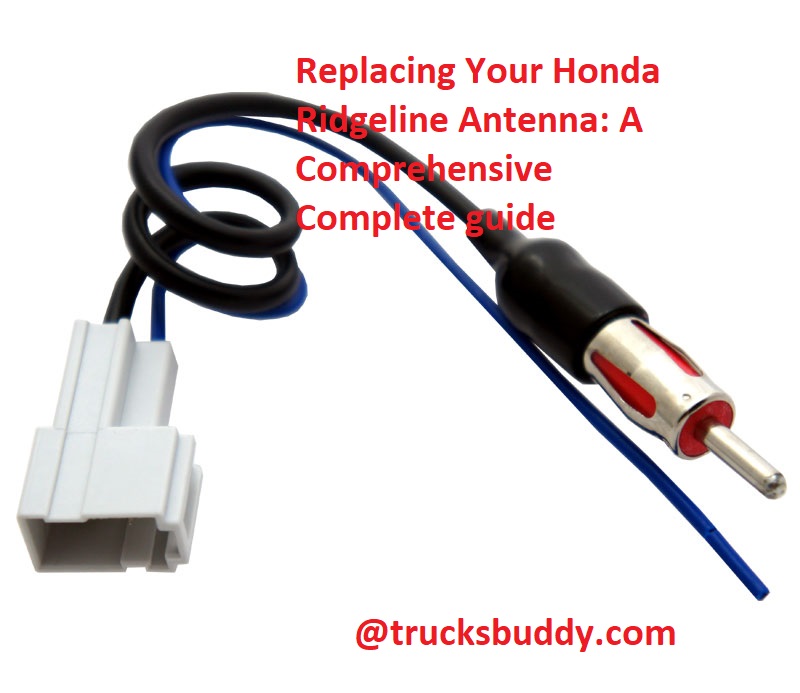
- Antenna adapter (optional): Depending on your setup, an Antenna adapter may be necessary in order for you to connect your new antenna with your existing radio system (FM/AM).
- Wire Stripper & Crimper: These tools are necessary for cutting and stripping wires used in the installation process as you will be working with electricity during this step of the installation process – take extra care when working with electrical components!
- Soldering iron (optional): If rewiring is required when removing an old antenna, then it is important to use a soldering iron in order to secure connections between wires after they have been cut & stripped of insulation material. This ensures that no loose connections will occur during future use & operations!
III. Removing the Old Antenna
It is important to take the time to properly remove your old Honda Ridgeline antenna before replacing it with a new one.
Start by peeling away the plastic coating on the passenger side of the vehicle to get a better view of the mounting nut. Once the nut is identified, locate a wrench and loosen the nut.
Carefully remove the antenna, making sure not to lose any of its pieces along their way.
Dispose of your old antenna in an environmentally friendly manner.
Precautions to take during the removal process
Before beginning the removal process, it is important to take necessary precautions while working on the Honda Ridgeline. Care must be taken not to damage many of the components in and around the vehicle’s antenna setup. Make sure to wear protective eyewear while working, as well as gloves and any other safety precautions necessary for completing this job.
Also, during the installation process, make sure that all components are tightened correctly and to manufacturer specifications. The antenna should not be over or under-tightened which could cause additional issues with reception or interference. With every step of the installation process, be sure to double check that all connections are secure before continuing. Once complete, test your reception in order to ensure that you have successfully installed your new antenna in a safe and secure manner.
Installing the New Antenna
Now that you have selected and purchased a new antenna for your Honda Ridgeline, it’s time to install it. Installing the new antenna is an easy process and can be done in a few simple steps.
First, disconnect the battery to make certain that no electrical power remains in the vehicle. Then remove the old antenna by unscrewing it from its base linkage as necessary. Next, clean the wiring connection points with a rag or some contact cleaner before connecting the new Honda Ridgeline Antenna wiring harness to them per instructions. Make sure that all connections are secure and protective caps are in place afterward.
Now you’ve arrived at the final step: attaching your new antenna to the base linkage and screwing it into place. Follow any included instructions regarding hand tightening of bolts and screws prior to fully tightening with a wrench or appropriate tool. Once everything is assembled, reconnect your vehicle’s battery and test out your work – your new Honda Ridgeline Antenna should be working perfectly!
Step-by-step process for installing the new antenna
Installing a new antenna on your Honda Ridgeline is a simple, but important, step for maintaining optimal performance. With the right tools and basic knowledge of your vehicle, it’s something you can do from home without help from a professional mechanic. This guide will provide instructions on how to properly replace your Honda Ridgeline antenna in four easy steps.
First, you’ll need to gather the necessary tools: Philips screwdriver and a socket wrench with 10mm socket attachment. Additionally, if you are installing an aftermarket antenna that is any length other than OEM, you’ll need to acquire an additional adapter kit specifically designed for your model of Ridgeline.
Second, carefully remove the two Phillips screws attaching the old antenna assembly onto the roof of your Honda Ridgeline using your screwdriver – don’t use too much force as this may damage the sheet metal. Then remove the 10mm nut attaching it at its base – again, take extra care not to strip this nut or damage its threads when removing it as this will render itself un-reusable. Finally lift up and away on the old antenna assembly until it pulls free from its base tube.
Thirdly slide in the aftermarket replacement by aligning with its connector mount at its lower end and hold in place while securing its attached 10mm nut at the base with your socket wrench (reusing the same one removed originally). Eventually tighten both Phillips screws down securely at top of assembly using your screwdriver – be sure not to over-tighten these screws as this may cause them to break off within their threads embedded in the sheet metal roof panel so remember less-is-more! Congratulations — you have successfully replaced your existing Honda Ridgeline Antenna!
Finally inspect all connections reassembled and verify successful installation by testing new antenna’s reception level when operating car stereo system – should sound clean without interference from noisy bars/lines/static stemming from poor transmission signal quality coming through airwaves/radio waves; if signal reception not sounding clear repeat replacement process ensuring all connections tightly secured throughout installation process for optimal performance levels.
Precautions to take during the installation process
One of the most important steps of the antenna replacement process for your Honda Ridgeline is to ensure safety throughout the installation. Here are a few key precautions to take when replacing your Ridgeline’s antenna:
- Check for engine fluid leakage: Before you start the installation process, check for any engine fluid such as oil, coolant, and transmission fluid on the ground from a previous repair. If you find any fluids, it may affect the installation process or even create a safety risk if it comes in contact with any electronics on the truck.
- Make sure all tools are grounded: When using any hand tools during antenna replacement, make sure they are properly grounded to avoid any potential electrical shock during the installation. Also, be sure to use proper tools of good quality that can handle constant wear and tear over time.
- Wear protective eyewear: When using power tools while replacing your antenna, always use protective eyewear to avoid foreign objects entering your eyes that could cause damage or serious injury.
- Properly secure wiring: When attaching new wiring and cables onto new antennas or existing components, make sure each connection is secured properly so they won’t rattle loose over time and get damaged. Also ensure every connection fits snugly between all components before finishing up your work.
Testing the New Antenna
Once your new antenna is mounted, it’s time to test it out. Start first by turning the engine on and then adjusting the radio settings. Make sure that you have the correct FM or AM frequencies set according to where you live. Then, set your sound level and adjust the tuning buttons until you find one of your favorite channels or stations. Further, adjust the gain on your radio and ensure that all of your connections from antenna to power source are firmly seated and secure.
Now take a test drive around town while observing sound quality at different locations and driving speeds. Does it pick up more sound than before? Are there clearer highs and lows? How much static do you hear? Do other stations come in better? This will help determine if you need any further adjustments such as installing an amplifier or a noise filter for reception problems.
For direct access networks like SiriusXM Satellite Radio, you may need a special installation kit to get started since physical exposure counts more on direct channels as opposed to broadcast signals from FM/AM towers. Once installed, confirm that each station is showing up correctly and with quality sound when tested at different speeds and locations during a test drive.
How to test the new antenna to ensure it’s functioning properly
Now that you’ve replaced your Honda Ridgeline’s antenna, it’s important to test it and make sure that it’s functioning properly before you close up the hood. This is a vital step and should be completed before taking your vehicle out on the road. To test your new antenna, use your radio, headphones or download and listen to a list of FM frequencies on a mobile device to determine if reception is clearer with the new antenna in place.
If using headphones for testing, make sure that you keep volume at low levels until you’re certain that good reception has been attained since cranking up the volume too quickly can damage speakers or headphones. It is also important to remember that some areas will have weaker radio signals based on their location. If possible, find an open area with few buildings or trees nearby as this will allow for better signal strength when trying to pick up stations.
If at first you don’t get any signal boost after the antenna replacement, try adjusting its angle by moving it slightly left or right until maximum performance is achieved. Good reception should also include being able to detect city names rather than just static noise when tuning into different frequencies. It may take some time and effort but if compiled with patience and attention to detail, you should have no problem getting perfect sound quality from your Honda Ridgeline once again!
Tips for troubleshooting any issues with the new antenna
If you’re replacing your Honda Ridgeline antenna, it’s important to make sure that the parts you ordered fit correctly and that they were correctly installed. This will ensure a secure, weather-tight installation and best reception performance. If you encounter difficulties during installation or after installation, follow these troubleshooting tips to help identify and resolve any issues encountered.
- Check antenna connection: Make sure the antenna is securely fitted into the base mount. Also confirm that no corrosion has occurred around cable joints or at the antenna base mounting flange. Have an experienced technician inspect all connections if necessary.
- Evaluate radio reception: If radio station signals are weak or distorted, verify whether the station has adequate power to transmit over a long distance by tuning to another station in a distant location with strong signal output. If this does not resolve the issue then consider replacing your Honda Ridgeline antenna with a higher-gain model for better reception performance.
- Check for obstructions: To get optimum radio reception from your Honda Ridgeline Antenna check for large metal objects such as nearby guard rails, buildings and overhangs nearby might be leading causing interference to FM/AM signals due to reflective surfaces and interference created by metal surfaces in surrounding areas of where you park or drive your vehicle regularly. Do some manual rearrangement of where you park/drive your vehicle regularly to compensate for affected areas in case obstacles can’t be avoided & test different directions in which antenna points towards sky while parked static in order too maximize signals if needed before any final permanent directional placement of your Antenna is set.
- Replace defective components: Occasionally, parts can become worn out or damaged after extended use due to weather conditions or extreme temperatures causing components inside the radio’s amplifier modules or other internal electrical circuits to fail, which can lead to audible noise within audio channels coming through speakers when receiving AM/FM stations which interfere with listening pleasure & experience when driving with new Honda Ridgeline Antenna mounted on roof; have an experienced technician check these parts if necessary before deciding whether part replacements are necessary .
Conclusion
In conclusion, replacing a Honda Ridgeline antenna requires a few simple steps. Before beginning, make sure you have the correct size/length antenna for your vehicle. Once you have the correct length and part number, there are three easy steps to complete the process of replacing your Honda Ridgeline antenna.
Start by unplugging the electrical connector from inside the cabin of the vehicle, then removing bolts to detach the old antenna from the vehicle. Finally, attach and insert your new antenna into position and tighten all bolts firmly with a torque wrench before reconnecting power to finish up.
Following these steps is all it takes to replace your Honda Ridgeline antenna, enabling you to be on your way with improved reception in no time!
FAQs
How much does it cost to change the antenna?
It varies depending on the make and model of the vehicle and the type of antenna, but it typically ranges from $50 to $200.
Is it easy to replace car antenna?
It depends on the make and model of the vehicle and the location of the antenna. In some cases, it can be a relatively simple process, while in others, it can be more challenging.
How much does it cost to fix a broken antenna?
The cost can vary depending on the extent of the damage and the type of antenna, but it typically ranges from $50 to $200.
How much does it cost to fix a car antenna?
It depends on the type of antenna and the extent of the damage, but it can range from $50 to $200.
How do you know if you have a bad antenna?
You may experience poor radio reception, or the radio may not work at all. You may also notice that the antenna is damaged or broken.
How often do antennas need to be replaced?
Antennas can last for many years, but they may need to be replaced if they become damaged or if they no longer provide good reception.
Will replacing car antenna improve reception?
Yes, if the old antenna was damaged or not functioning properly, replacing it with a new one can improve reception.
Will a new car antenna improve reception?
Yes, if the old antenna was damaged or not functioning properly, replacing it with a new one can improve reception.
Do aftermarket car antennas work?
Yes, aftermarket car antennas can work just as well as the original equipment antenna, but it’s important to choose a high-quality product.
Are antennas covered by insurance?
It depends on the insurance policy and the cause of the damage to the antenna. In some cases, antennas may be covered by comprehensive insurance.
See Also :
- Best brush guard for Honda Ridgeline
- Best brush guard for Honda Ridgeline
- Best synthetic oil for Honda Ridgeline
- Best leveling kit for Honda Ridgeline
- Best bug deflector for Honda Ridgeline