
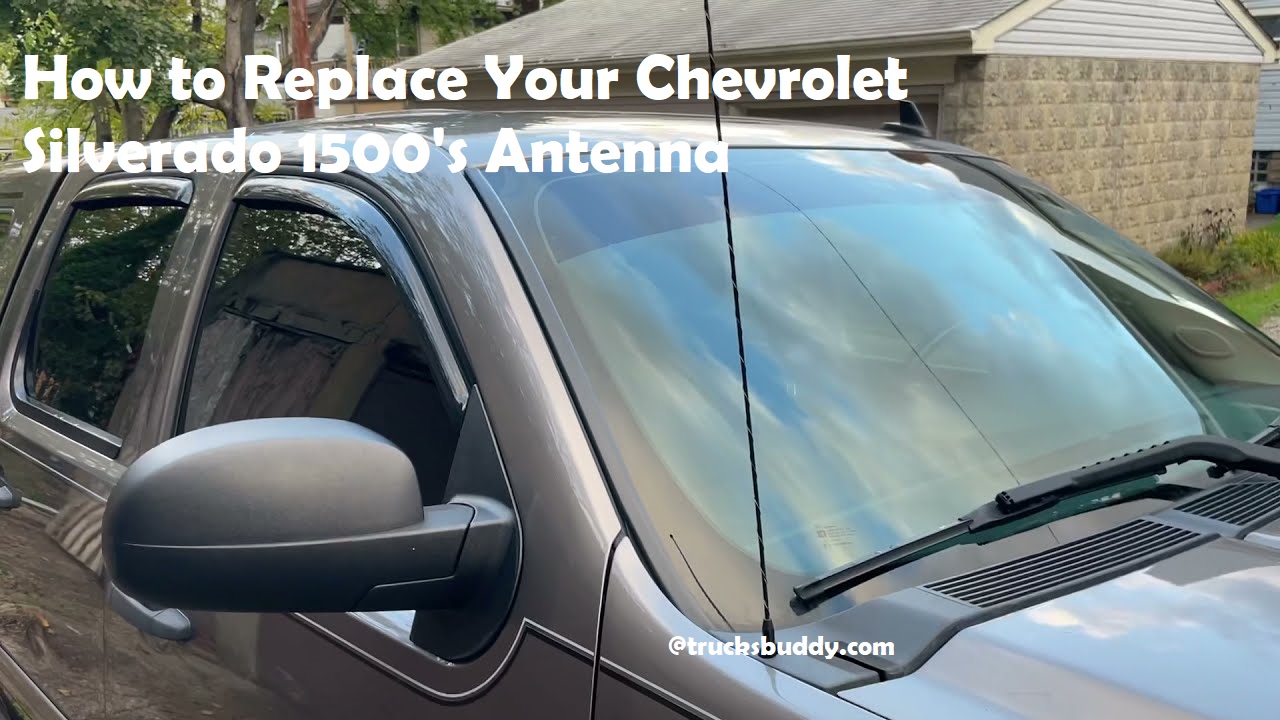
Do you want to replace your Chevrolet Silverado 1500‘s antenna but don’t know where to start? This guide will provide you with all the knowledge and tools necessary for a successful replacement.
With this step-by-step tutorial, you’ll have your new antenna installed in no time!
The Chevrolet Silverado 1500 is a mid-size pickup truck with several options on how to replace its factory-installed antenna. This guide is designed to help you navigate the different replacement styles, features and installation tips so that you can get your vehicle looking its best in no time.
This guide will discuss the various types of antennas available, from base-loaded to cb radios, as well as installation instructions for each type. Additionally, we’ve provided troubleshooting tips in case something goes wrong during the process. You’ll find everything you need here in this comprehensive guide — let’s get started!
Briefly introduce the importance of a functioning antenna for a Chevrolet Silverado 1500.
A functioning antenna is essential for any vehicle, particularly a Chevrolet Silverado 1500. Without a properly working antenna, the radio in your truck will be limited to static-filled reception when you attempt to tune into your favorite music station or listen to the news.
Furthermore, the antenna on your pickup is also the means by which radio frequency signals are received and received, allowing other devices such as bluetooth kits and security systems to function adequately. Replacing an outdated or damaged antenna can restore these lost systems and allow in-truck entertainment to perform properly once again.
Provide an overview of the steps involved in replacing the antenna.
Replacing the antenna of your Chevrolet Silverado 1500 isn’t a difficult job and can be completed relatively quickly. To get started, you will need the right tools, supplies and a replacement antenna. Below is an overview of the steps required to complete this task:
- Gather Tools: To begin the process of replacing the antenna on your Chevy Silverado 1500, gather the necessary tools including a Phillips head screwdriver, adjustable wrench and electrical tape.
- Disconnect Antenna Cable: To avoid damaging any wires, carefully turn off your vehicle’s power before disconnecting the antenna cable from the radio reception unit located near the rear driver-side door panel.
- Unscrew Existing Antenna Base: Disconnecting and removing old antenna may require releasing screws or other fasteners securing it in place; if so, use a Phillips head screwdriver to gently loosen screws keeping them available for later use with new assembly attachment parts or pieces where applicable.
- Attach New Antenna Base: After removing factory installed antenna, insert new one into base socket of car or truck where original one contained; securely tightening with fastener screws as needed for tight fitment unless adapter plate used instead lighter size bolts provided in t assembly kit if available first).
- Connect New Antenna Cable: Find end plug located at tail of cable that connects to receptacle unit likely located near rear passenger side door panel; ensure snug fit before power restored vehicle test mechanism to confirm it working properly after installation complete step otherwise repeat process until successful connection made throughout system cables wires peripheral parts pieces components attached functional device authorized vendor recommends whenever operating system failures occur technical problems arise highly recommended professional service necessary complex issues addressed verified quality repairs verified satisfaction customer promised warranty included product purchase matter interest circumstances arise power successfully functioning clarified finish by reconnecting electronic connection source radio station monitor ensuring process completed correctly properly documented recorded file just case future reference needed reminder good practice test note results record all maintenance activities avid mechanics hobbyists alike.
Assessing the Need for Replacement
One of the first steps in determining whether you need to replace your antenna is carefully examining the part itself. Depending on various factors including where you live and the type of driving you do, a typical antenna will last anywhere from two to five years before needing replacement.
If it is certainly time for a new one, check how securely the original has been mounted and take stock of any corroded or rusty screws or fittings as they will need to be taken care of as part of the process. In addition, inspect the surrounding area for evidence that your antenna may be coming loose, such as scuff marks or bare metal scratched by dragging against branches or over garage doors.
Explain how to determine if the antenna needs to be replaced.
In order to determine if the antenna on your Chevrolet Silverado 1500 needs to be replaced, several factors must be taken into consideration. It is always best to inspect the antenna first before replacing it.
Start by visually inspecting the antenna for any cracks or visible damage. Cracks and dents can appear over time due to normal wear and tear, car washes, or simply from dirty roads. If you cannot visibly see any cracks or damage, then you are ready to check for any electrical faults.
Using a multimeter, check the voltage of the power cables that run up from the radio unit to the antenna mast. The voltage should read between 11 and 13 volts when tested in DC mode – if not then this may indicate that there is a fault somewhere in your cabling. If you measure less than 11 volts then the cabling may have been corroded – in which case it would need replacing too along with the antenna mast itself.
Discuss common signs of a faulty antenna.
If you suspect you may need to replace your Chevrolet Silverado 1500’s antenna, there are a few common signs that suggest this is the case. One of the most obvious signs is if you are having trouble when trying to receive radio stations. If you’re experiencing a weak or intermittent signal, or can’t receive certain stations at all, this could be a sign your antenna needs to be replaced.
In some cases, a faulty antenna can result in poor reception quality when listening to music or other audio. If your audio keeps cutting in and out, it’s possible there’s an issue with the antenna itself. You should also keep an eye out for any physical damage to the antenna that could be affecting its performance. As antennas age over time, they become worn out and may require replacement. This includes damage such as denting or bending of the antenna mast.
If replacing or repairing an existing car antenna isn’t something you feel comfortable doing yourself, then it’s best to seek out the help of a professional mechanic who can help ensure it is done properly without further damaging the vehicle’s wiring system.
III. Preparing for Replacement
Before you start replacing your antenna, it’s important to make sure that you have all the right tools and supplies. Here’s a list of what you’ll need:
-A replacement antenna for your Chevrolet Silverado 1500 (ensure the size is suitable for your vehicle)
-A socket wrench
-A flathead screwdriver
-Protective eye wear
-Rubber gloves
-Painter’s tape and masking tape
-Rust remover, if necessary
Once you’ve gathered all of the necessary materials, it’s time to begin working on replacing your antenna. Keep in mind that safety is an integral part of this process—always make sure that you are wearing protective eyewear, rubber gloves and any other protective equipment needed to complete the job safely.
Discuss the tools and materials needed for the replacement.
When replacing the antenna in your Chevrolet Silverado 1500, you will need a few essential tools and materials:
- Antenna Mast: This is the part that is visible above your truck’s hood. It usually comes as a single piece of equipment but can also be found on certain models as two separate pieces.
- Hex Wrench: This tool will let you adjust the bolts and connections on the antenna mast to ensure it fits securely into place.
- Phillips Head & Flathead Screw Drivers: These two tools will enable you to remove any screws that may be needed for the replacement process, including removing the hood clips that attach the antenna to your hood panel.
- Cable Crimpers: These are used to crimp together connections on cables needed for installation of new parts or replacements, such as coaxial cable or audio speakers.
- Electrical Tape: Used to secure connections and help prevent them from coming apart during installation or regular use of your Silverado’s antenna system.
- Radio Antenna Base: The base of an aftermarket radio antenna utilizes threaded nuts in order to mount onto your vehicle’s metal surface securely and with ease for hassle-free installation process every time!
Explain how to access the antenna on a Chevrolet Silverado 1500.
Accessing the antenna on a Chevrolet Silverado 1500 is relatively simple, but there are a few steps that must be taken in order to properly access and replace it.
First, you will need to locate the vehicle’s hood release lever. This is located on the left side of the steering wheel. Once you have located and released the hood, you will need to open it in order to gain access to the engine compartment and antenna.
Next, disconnect any electrical connections and remove any clips which secure the antenna mounting bolts. If present, you must also remove protective caps from each of the mounting bolts. After this has been done, use an appropriate sized socket or wrench to loosen and remove each of the antenna mounting bolts before pulling away from its mount altogether.
Once disconnected from its mount, your new replacement Chevrolet Silverado 1500 Antenna can be securely mounted in its place with all four included mounting bolts. Once those have been tightened down appropriately, replace any protective caps while attaching any wiring harnesses or other electrical connections as necessary before closing up the hood again and testing out your newly installed Antenna!
Replacing the Antenna
Replacing the antenna on your Chevrolet Silverado 1500 is a relatively straightforward process. To begin, make sure that the vehicle is off and that you have disconnected the negative battery cable to avoid shorting out electrical components. From there, use an Allen wrench or other appropriate tool to loosen and remove the antenna base from its mounting location on the vehicle’s roof. After removing any other associated bolts that secure the old antenna, it can be removed from its mount and discarded.
To install the new antenna, simply attach its base to the mounting location on the roof of your Chevy Silverado 1500 using any necessary screws or bolts and fasten them as needed. With the new antenna in place, re-connect all power cables and reconnect your negative battery cable before powering up your radio to test if you have installed it correctly. Make small adjustments as necessary until you have achieved optimal functionality with your new replacement antenna!
Provide a step-by-step guide on how to replace the antenna.
Replacing the antenna of your Chevrolet Silverado 1500 requires a few tools, including a Phillips-head screwdriver and needle-nose pliers. This step-by-step guide will walk you through each step so that you can complete the task easily.
- Begin by purchasing an aftermarket antenna or retaining the same one. Make sure to double-check that it is compatible with your Silverado model by referring to the product specifications.
- Open your hood and locate the antenna connector on the back of your Silverado’s radio unit. You need to disconnect this from the radio unit in order to be able to remove it later on, so take caution when doing this step.
- Flip up the retaining spring clip located at the base of your antenna in order to remove it from its mount, then unscrew and pull out your old antenna once all components are loose and disconnected.
- Insert and carefully screw in your new antenna, then insert it into its mount and flip down its retaining clip so that it is secure before closing up any panels or doors you may have opened earlier while performing this repair job.
- Reconnect both ends of the cable connecting your radio unit to the new antenna, verifying tightness before closing up shop for good – voilà! You now have a brand new shiny & secure Chevrolet Silverado 1500 car audio system ready for cruising!
Conclusion
Replacing the antenna on your Chevrolet Silverado 1500 can be a straightforward process. Make sure to plan your repair in advance, including purchasing all necessary tools, parts, and supplies. Ensure that the new antenna is compatible with both the model of vehicle and type of radio you’re using to avoid compatibility issues.
During installation, handle your new antenna with care; avoid any hard bending as it could weaken its signal strength. Once your installation is complete, enjoy improved satellite and radio signal reception!
FAQ’s
How do I replace my truck antenna?
If you’d like to replace your truck antenna, you’ll need to first determine the correct antenna for your vehicle. Then, remove the old antenna by unscrewing its base and unplugging any necessary cables. Install your new antenna by attaching the base to the mount, plugging any necessary cables, and checking for signal strength.
How do you fix a broken antenna?
Replace the antenna with a new one.
How do you remove an antenna?
To remove an antenna, unscrew the screws holding it in place and gently pull it out. Ensure the antenna is safely disconnected from the wall socket before pulling it away from the unit.
How do I install a new antenna?
To install a new antenna, you’ll need to mount the antenna to the roof or other location and run a coaxial cable from the antenna to the TV or radio. Make sure that the cable is connected to the correct port on the back of the device before turning it on. Finally, use a signal meter to check for signal strength, adjust the antenna accordingly and you’re good to go.
How much does it cost to replace antenna?
The cost to replace an antenna can vary depending on the type of antenna and the complexity of the installation. On average, however, it can cost anywhere from $100 to $200 to install a new antenna.
How do I know if my antenna is broken?
You can check to see if your antenna is broken by checking for physical damage and testing the antenna to see if it’s receiving signal.
How do I know if my antenna is damaged?
If your antenna is damaged, you may experience a decrease in signal strength and poor sound quality. You can check the antenna by disconnecting it from the device it is connected to, or disconnecting any extension cables, and then placing your hand close to the antenna on both sides. If your hand causes static or a decrease in sound quality, it is likely that the antenna is damaged.
Do antennas need to be replaced?
No, antennas do not need to be replaced unless there is physical damage or the antenna is not functioning properly.
How often do antennas need to be replaced?
Antennas do not need to be replaced unless they are physically damaged or degraded due to wear and tear.
Can you install an antenna yourself?
Yes, you can install an antenna yourself.
See Also-
- Best nerf bars for Chevrolet Silverado 1500
- Best upgrades for Chevrolet Silverado 1500
- Best floor mats for Chevrolet Silverado 1500
- Best performance chip for Chevrolet Silverado 1500
- Best throttle response controller for Chevrolet Silverado 1500